Pic.1
Pic.2
16v PowerSprint Conversion |
|---|
After running my TR7 for a few months, I decided it needed a bit more power and started to look at ways I could improve performance on a relatively tight budget.
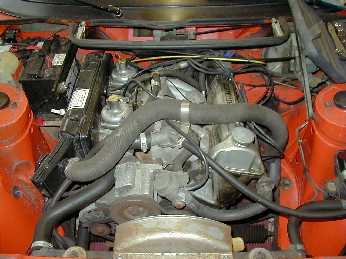
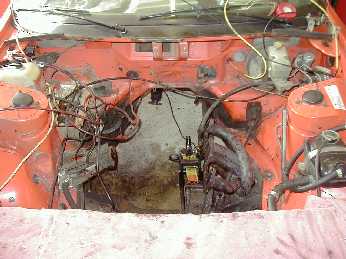
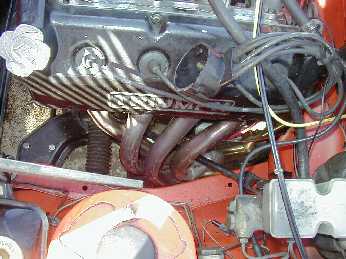
The most obvious place to start was the engine (Pic.1). The engine itself was fine, but being a Canadian spec car (later ended up in Texas and then shipped back to Blighty !!), the set up was down on normal TR7 power (around 90bhp). I could have rectified this by stripping off the Stromberg carbs and reverting to a UK set up (around 105bhp), but I wanted to try and do something a bit different, so an engine change it was.
Pic.1 |
Pic.2 |
|---|
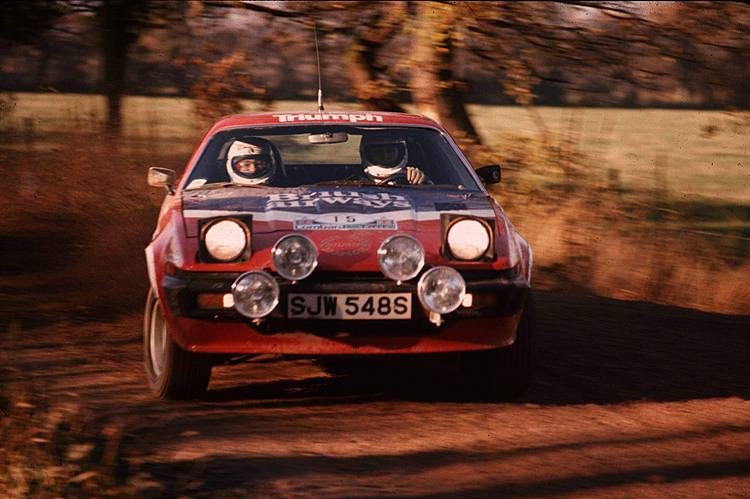
With this reasoning, I realistically had two choices... the Rover V8 route or Dolomite Sprint. When you look at the Works Rally TR7s (Pic.2), they were originally Sprint engined and were some of the best performing cars in their time. They were later changed to the V8 engine, supporting the decision to make a choice between the two.
The V8 is probably a more common change, but everyone does it. You can’t get away from the fact the sound is glorious, power is good at around 133bhp or 148bhp if fuel injected, but it’s not a cheap conversion if you’re going to do it right... On the other hand, the Sprint conversion is far easier and tuned correctly the engine can supply a fair bit of poke (around 130bhp in standard spec)... and so the decision was made to follow my pocket rather than the trend !!!
Further investigation revealed it's a reasonably straight forward conversion and after sourcing an engine and new TR7 Sprint manifold for little more than Ł200, the time had come to start.
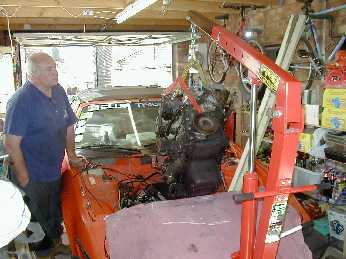
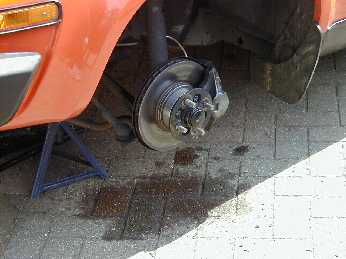
After removing the bonnet and radiator to allow access, labeling hoses and the wiring the time had come to disconnect everything and remove the old engine. A little tip if you have a digital camera is to take loads of photos from different angles as a point of reference if everything else fails. Removing the engine was actually a lot easier than expected and within an hour or so, the engine was supported by a crane. Remember when disconnecting the propshaft, you may have to disconnect it's support bracket for access - if this is the case, make sure you temporarily reconnect it once the gearbox is out of the way, otherwise it may damage the UJ's on the propshaft. We placed a trolley jack under the gearbox to allow it to drop and slide forward easily and had blankets over the nose cone to give some protection. As you can see from the Pic.3, the exit angle is pretty steep. In order to help with the angle, we had the front wheels of the car on large blocks of wood and the rear wheels on ramps. The back being higher makes the dramatic angle more achievable without taking half of the nose cone with it !!! The blocks of wood under the front wheels ??? Try getting an engine crane under the car without them !!! You have been warned...
 Pic.3 |
 Pic.4 |
|---|
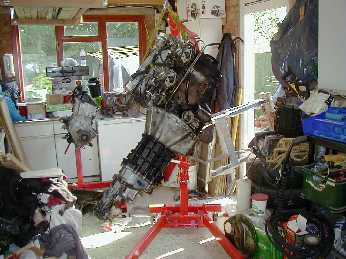
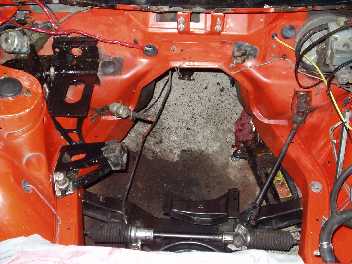
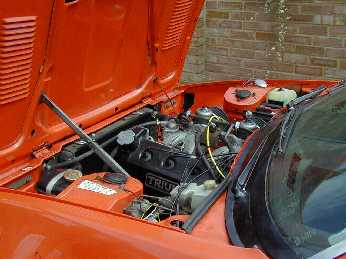
With the engine removed (Pic.4), I took the opportunity to give the engine bay a really good clean, touched up the paint in a few places and then gave it a good coat of Waxoyl (Pics.5&6).
 Pic.5 |
 Pic.6 |
|---|
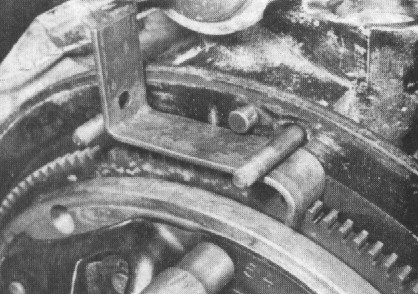
Back to the engine, we dropped the gearbox off and detached the other parts required for installation of the Sprint engine. These included the sump, engine mounts, flywheel, gearbox adapter plate, alternator brackets and the thermostat housing. Definitely the hardest part was removing the flywheel, as it’s torqued up so tight. This was where a recent purchase came in handy... enter my impact wrench, three minutes later and the flywheel was off. If you haven’t got access to an impact wrench, you’ll need to find a way of locking it so it cannot spin. One solution is to use a bracket which "fashioned" to hook behind something on the engine block, with the other end catching one of the teeth of the starter ring (Pic.7).
 Pic.7 |
 Pic.8 |
|---|
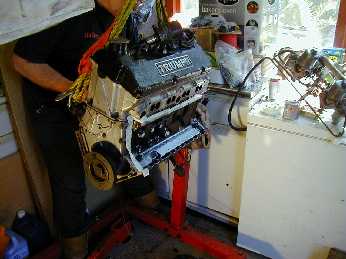
We then turned our thoughts to the Sprint engine. We firstly de-greased and cleaned it within an inch of it’s life (keep all those old toothbrushes, they're brilliant for getting into all the little fiddly bits), then painted all the appropriate parts with black engine enamel. We painted this on with a small brush, but from the finish you wouldn’t know (Pic.8).
Following this, we began to fit the necessary TR7 parts. Fitting the TR7 sump, remembering to leave the holes where the engine mount bolts on, bolting on the flywheel and adapter plate, fitting a new TR7 5 speed clutch (a clutch aligning tool makes this job a lot easier) and finally bolting up the gearbox.
Before fitting the new engine, I examined all the engine and gearbox mounts for wear and would suggest replacing the rubbers if you are in any doubt (especially the gearbox one as this tends to perish a lot quicker due to localised oil leaks).
Fitting the engine in the car, was much the same as the removal - dramatic angle, drop the gearbox on to the trolley jack, which then allows that to roll backwards with ease... just remember to get all hoses and wires clear so they don’t interfere. Once in place all the mounts were bolted up and the propshaft reconnected.
Now attention turned to reconnecting everything. One thing I hadn’t thought about was the heater hose connections. The Dolomite connections are totally different to that of the TR7, hence there are some "interesting" solutions suggested. The few TR7 Sprints in existence have a altered backplate on the cylinder head, giving an outlet in much the same place as that on the 8v engine, so you can then use the original hoses. However, as you can imagine, these plates are not exactly easy to come by, even aftermarket ones, so I had to find a different solution. This resulted in using 2 of the original ‘L’ shaped heater hoses, some copper pipe, changing the hose connectors and doctoring the Sprint solid pipe that runs under the inlet manifold. It took a bit of time to work out, but it works. After changing the thermostat housing, the other connections were pretty much the same as the TR7. The TR7 alternator bracket uses different holes to the Dolomite, so make sure you do use the correct ones. A new short alternator belt was fitted, between the alternator and crankshaft pulley only as I was opting for an electric fan set up.
Attention then turned to the manifold and exhaust. The 4 branch manifold I had obtained mated straight onto the already fitted sports exhaust. This was where the first major challenge was experienced... Now I mentioned earlier that my car is of Canadian origin and is indeed still left hand drive. Being LHD, it has a steering column going straight through the middle of the manifold. This wouldn't normally be a problem, if the manifold had it's bends in the correct positions, mine unfortunately didn't causing it to catch on the column and the chassis arm. This resulted in the manifold being fitted, removed, altered and re-fitted about 6 or 7 times (Pic.9). The alterations were carried out using a delicate persuader (Pic.10) and once happy, the manifold to head face was smeared with exhaust jointing paste and bolted up.
 Pic.9 |
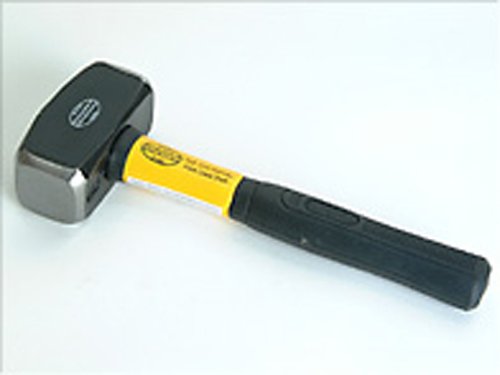 Pic.10 |
|---|
With the wiring loom reconnected, coolant added and oil filled, the time had come for the first fire up. One final check round the car to ensure everything was connected and tight, then reconnect the battery and turn the key. Result, lots of spinning, not much firing... By a process of elimination we found the timing was out by 180 degrees (note to self, if taking distributor out, don't move anything else !!) - After spinning the distributor spindle 180 degrees (which incidentally is a lot easier on a Sprint engine), it fired first time and leapt into life.
The car appeared to be running a bit rough, which turned out to be a combination of things. A dodgy coil was substituted for a very nice Lucas Sports Coil (around Ł16), with the addition of a Newtronic electronic ignition (around Ł80) to save all that nancying around with gapping points every five minutes. The carbs needles were then changed in the SUs for a "richer" set up, allowing a better flow. This gave much smoother running, but still wasn’t quite right. A trip to visit Dale and Bruce at Moordale Motors who were enlisted to tune it. The result was astounding... a very smooth running, free revving set up with loads of power on tap.
Aside from the engine conversion, it is advisable to upgrade the brakes and suspension on the car, in order to deal with the extra power (Pic.11). My brake conversion is covered on another project page and luckily the car had uprated springs and adjustable shockers when I bought it.
 Pic.11 |
 Pic.12 |
|---|
Was it worth the change (Pic.12)? Without a shadow of doubt, my answer would be yes. Because of the engine characteristics, it loves to be revved and acceleration is a lot more forthcoming. The car now has comparable performance to modern motors and certainly surprises a few people on the road. It still maintains good fuel economy when cruising (around 32 mpg), which is thankful when contemplating events like the Round Britain Run, (the car is entered this year for it’s second time). The Sprint conversion makes a lot sense for those wanting more power on a tight budget and without a lot of grief... Go on do it, you know you want to !!!